| Fensys low maintenance UPVC plastic gate options
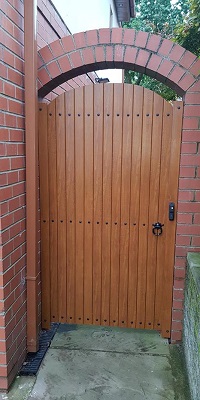
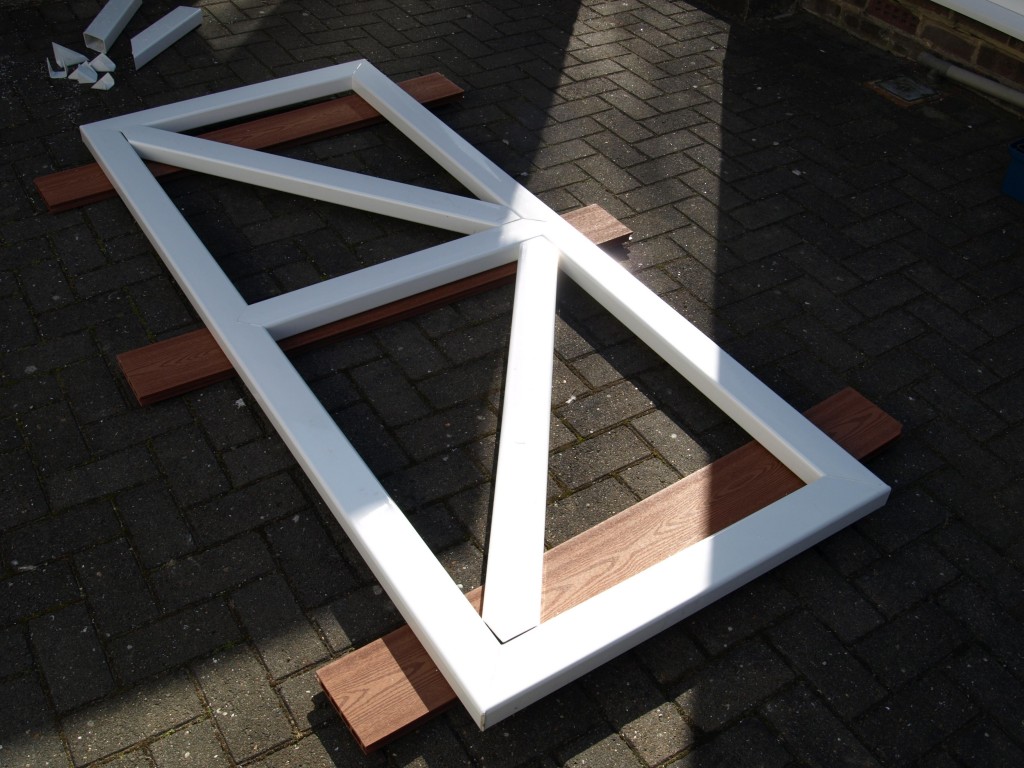
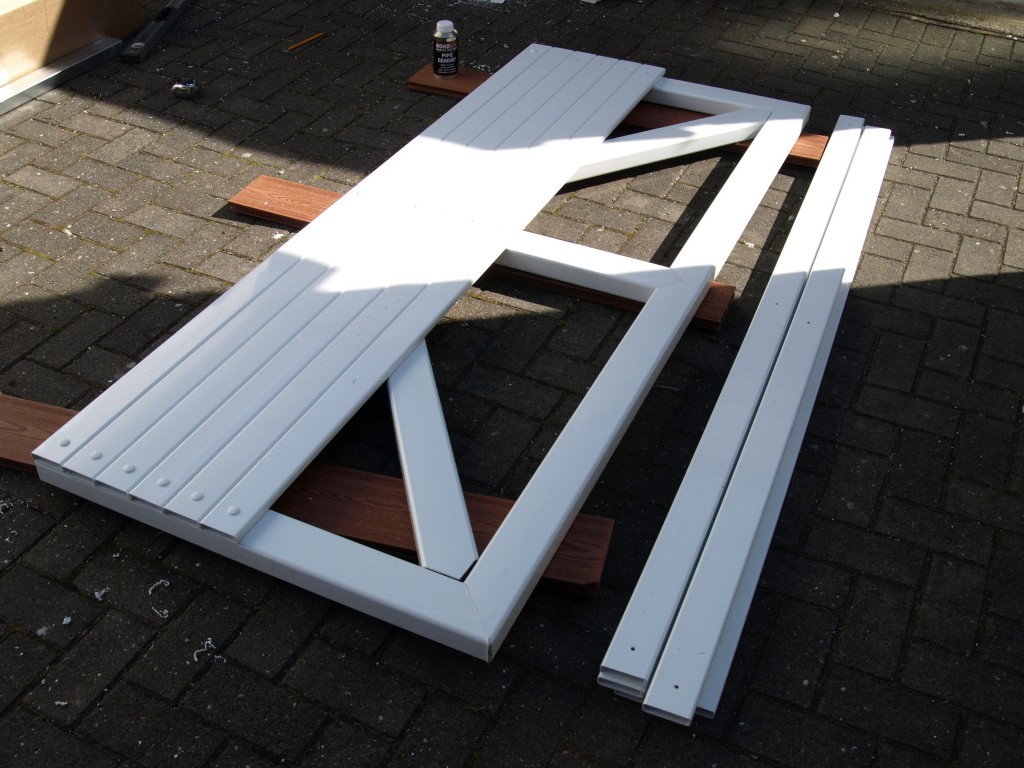
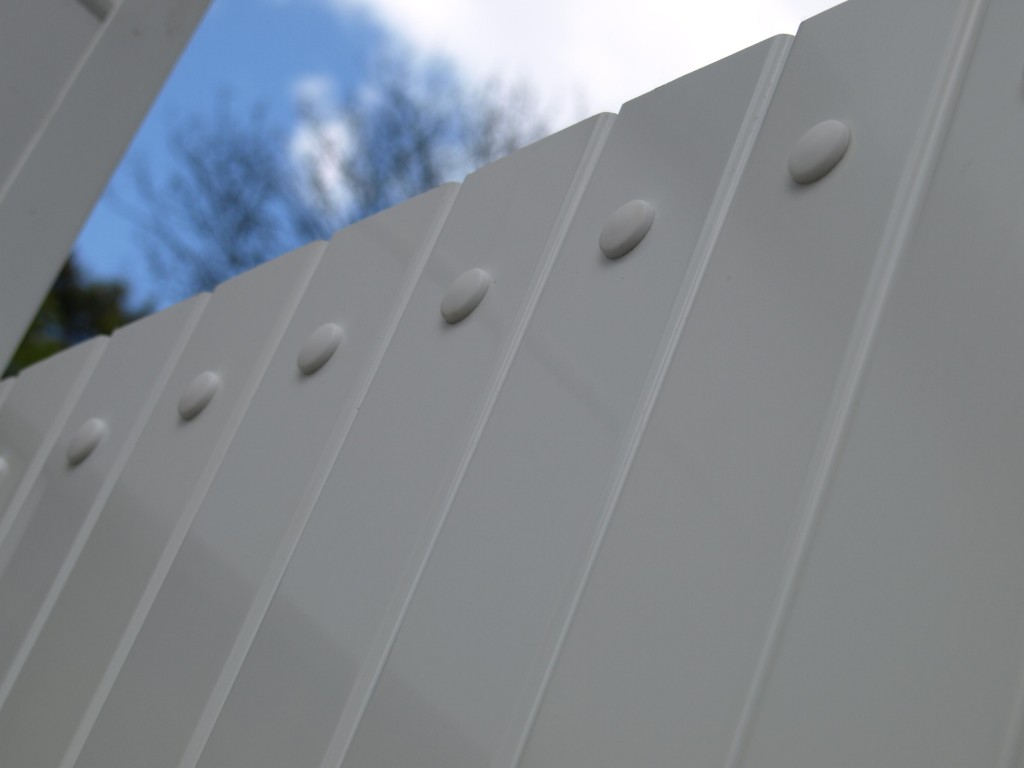
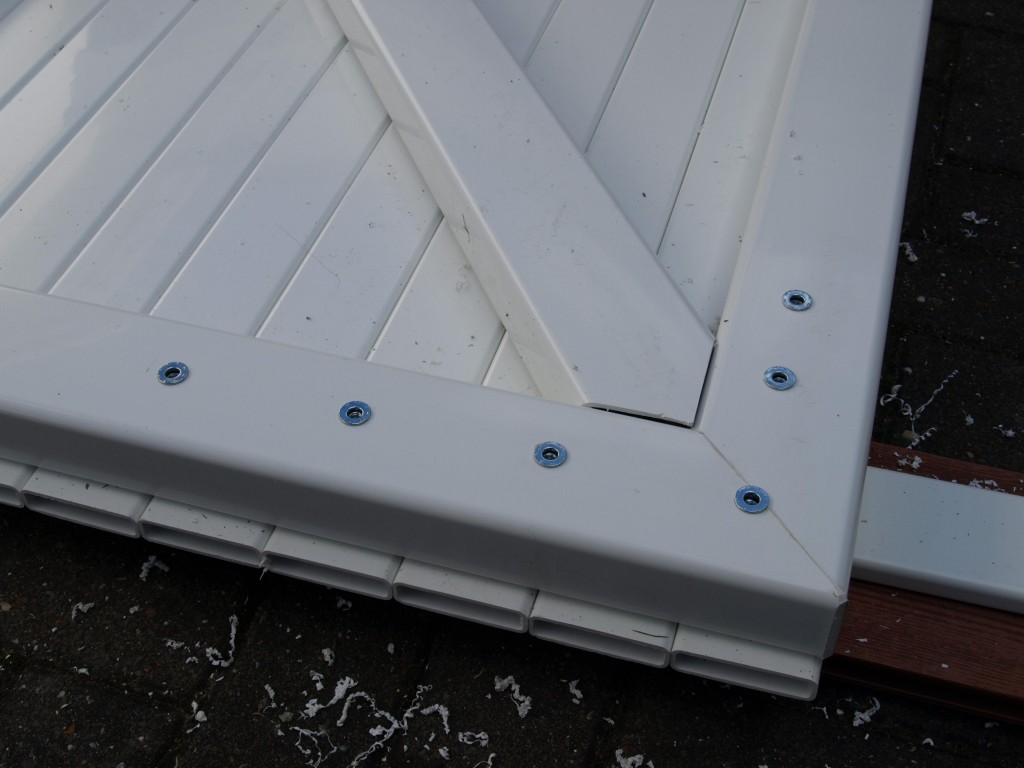
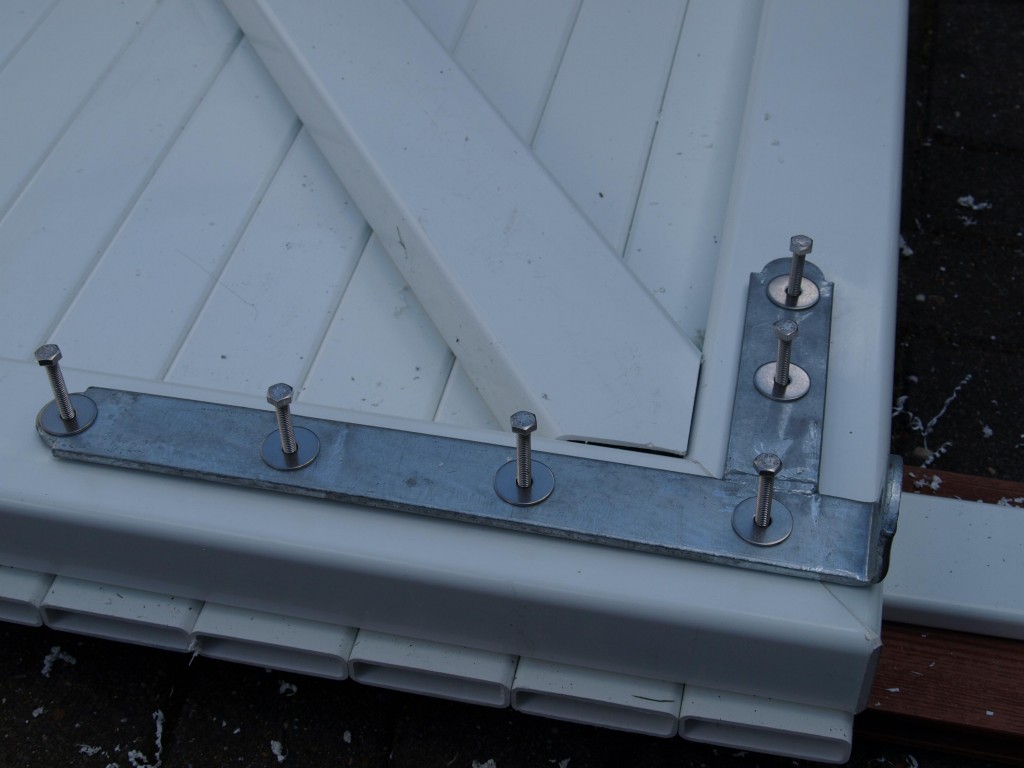
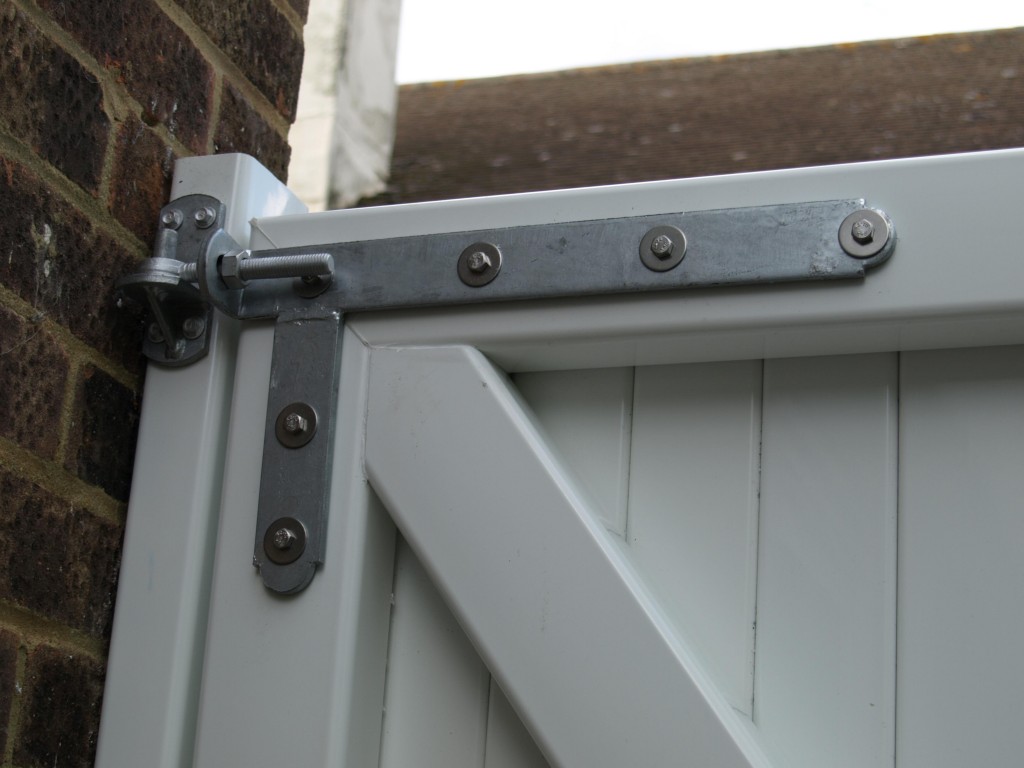
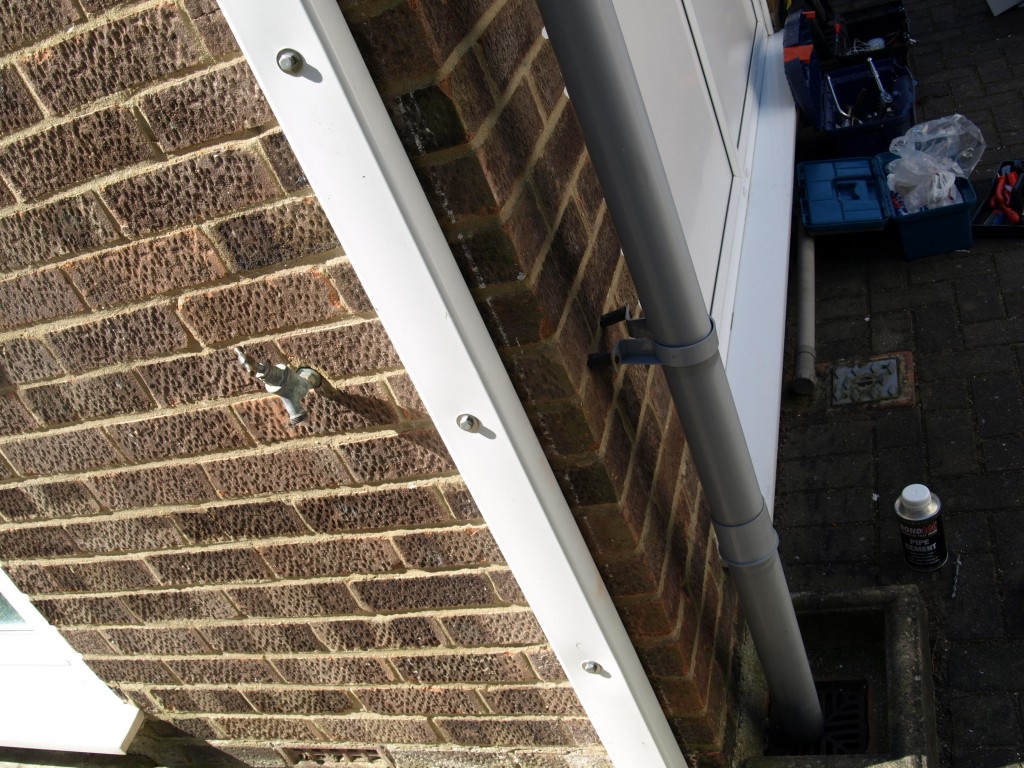
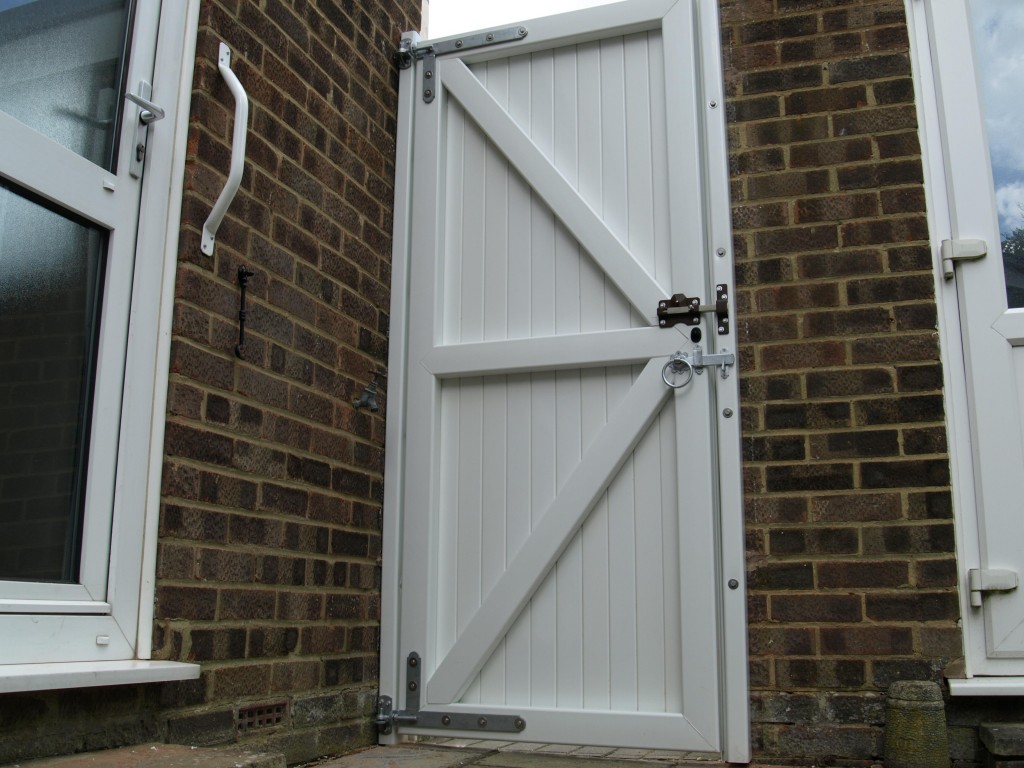
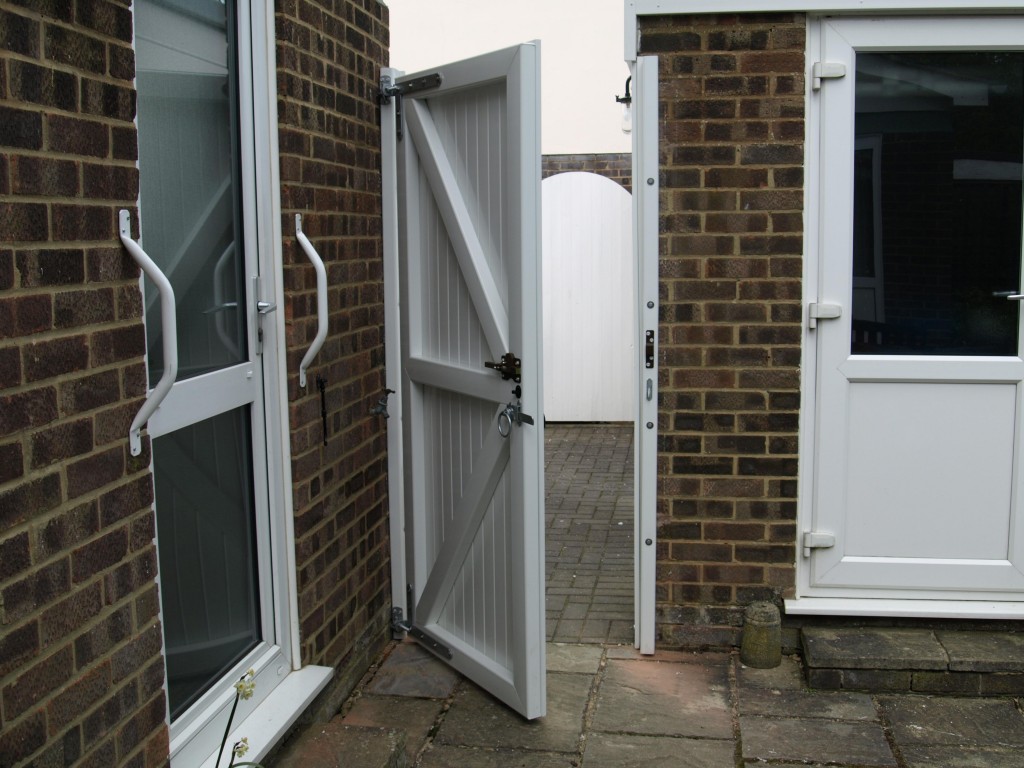
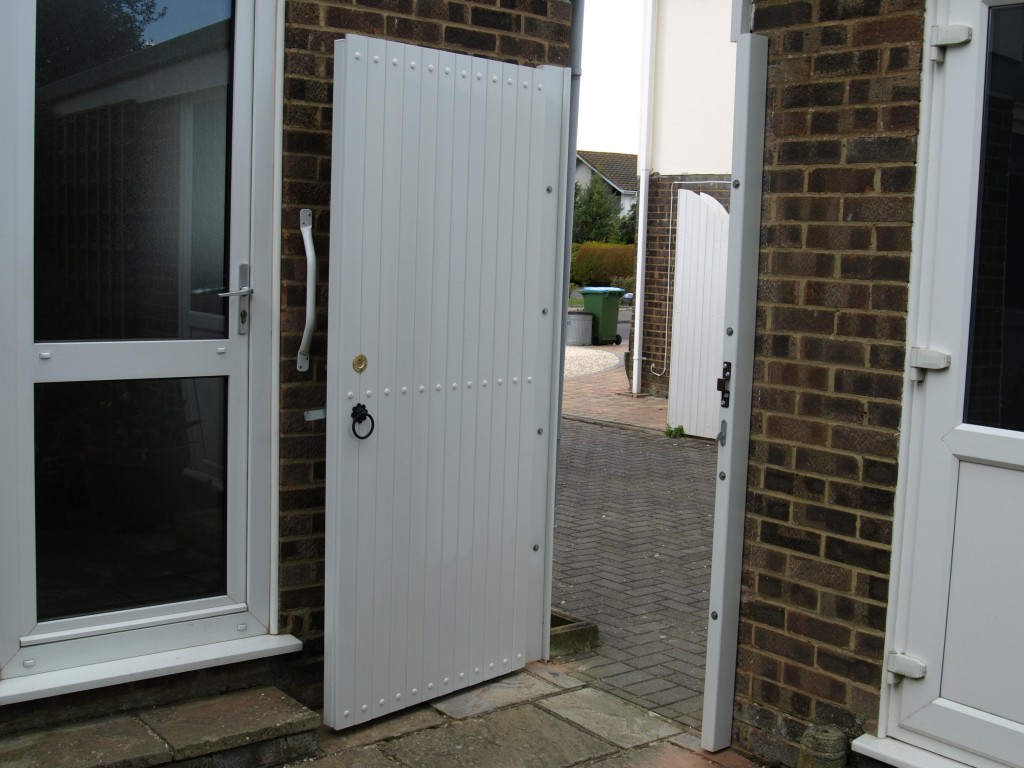
All gates are produced using high specification outdoor grade UPVC plastic. White gates are skinned with a high grade polymer cap layer that has excellent weather resistance and a premium finish. Wood grain effect gate finishes such as green, grey, rustic oak and golden oak are all produced using the same type of outdoor grade technical plastic film as double glazed window frames. Technical plastic films have a proven track record for exceptional weather resistance.Style options include flat top single and double gates. Arch top designs can be concave or convex and the Stanley gate option with its spaced slats offers a lighter weight variant with some through visibility. Colours options include white and wood grain finishes dark green, dark grey, rustic oak and golden oak. All gates sizes are produced to order, single gates can be up to 1.6m wide and double driveway type gates can be up to 3.2m wide. Larger opening can be spanned by adding fixed panels or combining double driveway gates with a single pedestrian gate. All gates are manufactured and delivered in kit form and are designed for installation by a person with trade skills. Gate Kit Assembly Guide Fensys gates are installed through our network of approved installation partners, alternatively gates can be supplied in kit form for self installation. Fensys recommend installation is carried out by a person with suitable trade skills. The following guide can be used for trade installation.The following is a guide for assembling Fensys kit form garden and drive way gates. Each gate kit will come with the following items as standard Welded Gate Frame / Frames 2 x Cross Braces for each gate frame 2 x Gate Posts (wall mount or free standing types available) Heavy duty galvanised gate hinges Galvanised gate ring latch Galvanised pad bolt Galvanised floor drop bolt (subject to application) Pickets to fit to gate frame Nylon shutter locks for attaching pickets to gate frame Additional pickets for fitting to the gate posts (subject to application) Gate Fixing Kit (threaded rivets, bolts, washers & tech screws) Outdoor grade Yale type lock (only if specified) Installation Guide The first step will be to mark up and fit the cross braces to the welded gate frame. Position the cross braces underneath the welded gate frame as shown to enable them to be marked up. Each cross brace should be marked to the inside of the welded frame. Once marked up the cross braces can be cut using a suitable saw. Ideally these cross braces should be a push fit into the frame once cut but not so tight that a mallet is needed to fit them. The image shows how the gate frame should now look with the cross braces in place. The next stage will be to fit the pickets to the gate frame. The style of gate (flat top or curve top) will depict the length of picket supplied with the kit. On a curve top gate the pickets will be supplied oversize to allow for cutting the curve. The welded gate frame will always be manufactured so that a whole number of pickets will fit to it. Position the first picket level with the bottom and one edge of the welded frame. The picket can now be marked up along its centre line and where it lines up with the welded frame. Whilst holding the picket in the correct position a 6.5mm diameter hole should be drilled through the picket and into one face of the welded frame. To fit the picket to the frame, first a small amount of pipe cement or suitable adhesive should be put directly onto the welded frame where the picket will cover. Position the picket on the welded frame and push the Nylon fixing into the drilled hole and through into the welded frame. This should be repeated for the remaining 2 holes on the picket. The nylon fixings are designed to be a tight push fit and once they are in place will not be removed easily. The above steps should be repeated for the remaining pickets remembering to use the adhesive where the picket covers the diagonal cross braces. If the gate is a curve top it can now be marked up and cut using a jigsaw. The next stage is to fit the gate hinges to the frame. Position the hinge on top of the frame to mark up the 6 fixing holes. The welded frame should now be drilled using a 10.5mm diameter hole for the 6 fixings. The threaded rivets out of the gate fixing kit should now be pushed into the 10.5mm diameter holes as shown. Now position the hinge and insert the stainless bolt with a washer through the hinge and into the threaded rivet. All 6 bolts should now be tightened up. The threaded rivets are designed to open up behind the plastic as they tighten up. The photo to the left shows the approximate position that the hinge needs to be fixed. The hanging post now needs to be installed. The method for installation will vary dependant upon the location of the gate. The example shown here is to be fixed to the wall. The galvanised steel should be inserted into the hanging post making sure it is orientated so the hook of the hinge will be fixed into steel. Take the gate post with the steel reinforcement in, position on the wall using a spirit level and drill through the PVC post, steel insert and into the wall. Suitable wall fixings should be used to now secure this post to the wall making sure they are outdoor grade such as galvanised or stainless finish (not supplied with kit). The process should be repeated for the second gate post. The 2 hooks can now be fixed to the hanging post using the supplied self drilling tech screws. It will be necessary to position the gate frame next to the post to determine the position of the gate hooks. Fasten both hooks to the hanging post making sure they are fixed into the steel inside the post. The hinges can be fully adjusted to make sure there is an even gap between the gate and the post. The gate ring latch can now be fitted along with the outdoor grade lock and catch supplied. The ring latch should be positioned high enough so that it is comfortable to use. The gate can now be finished off using a suitable colour silicone sealant to fill any visible gaps between the diagonal cross brace and the welded frame. It is also advisable to run a bead of silicone around the inside of the welded frame to seal between the pickets and the frame. Additional pickets can be supplied to fix to the front of the gate posts to reduce the visible gap between the gate and post. The nylon shutter locks can be used in this instance and will match the front face of the gate. Should you need any further information |
|
- Fensys
- Fensys about us
- Fensys Quotation
- Fensys Installation
- Fensys News
- Testimonial Beaumont
- Testimonial Cosgrove
- Testimonial Drayton
- Tips on Sundeck Design
- Style Board – The Optimal Decking board
- Style Board – Installed with a curve
- Style Board – Home Garden Installation
- Premium Eco & Excel Deck Boards
- Fensys Media Hub
- Fensys – Frequently asked questions
- Literature Download
- Products
- Information Decking & Skirting
- Information UPVC Fencing
- Information UPVC Gates
- Technical Information Decking
- Technical Information Fencing
- Technical Information Gates
- Gallery Holiday Home Decking
- Gallery Caravan Deck Designs
- Gallery Home Garden & Composite Decking
- Gallery Commercial Decking Areas
- Gallery UPVC Skirting
- Gallery UPVC Fencing
- Gallery UPVC Gates
- Gallery Fensys Components
- Contact us
- PAL Group